Notes View
Notes view shows a scrollable list of your notes alongside a full detail panel for the selected note. It's ideal for browsing through notes one at a time and editing individual records. This page covers navigating, searching, sorting, and editing in Notes view.
Structure
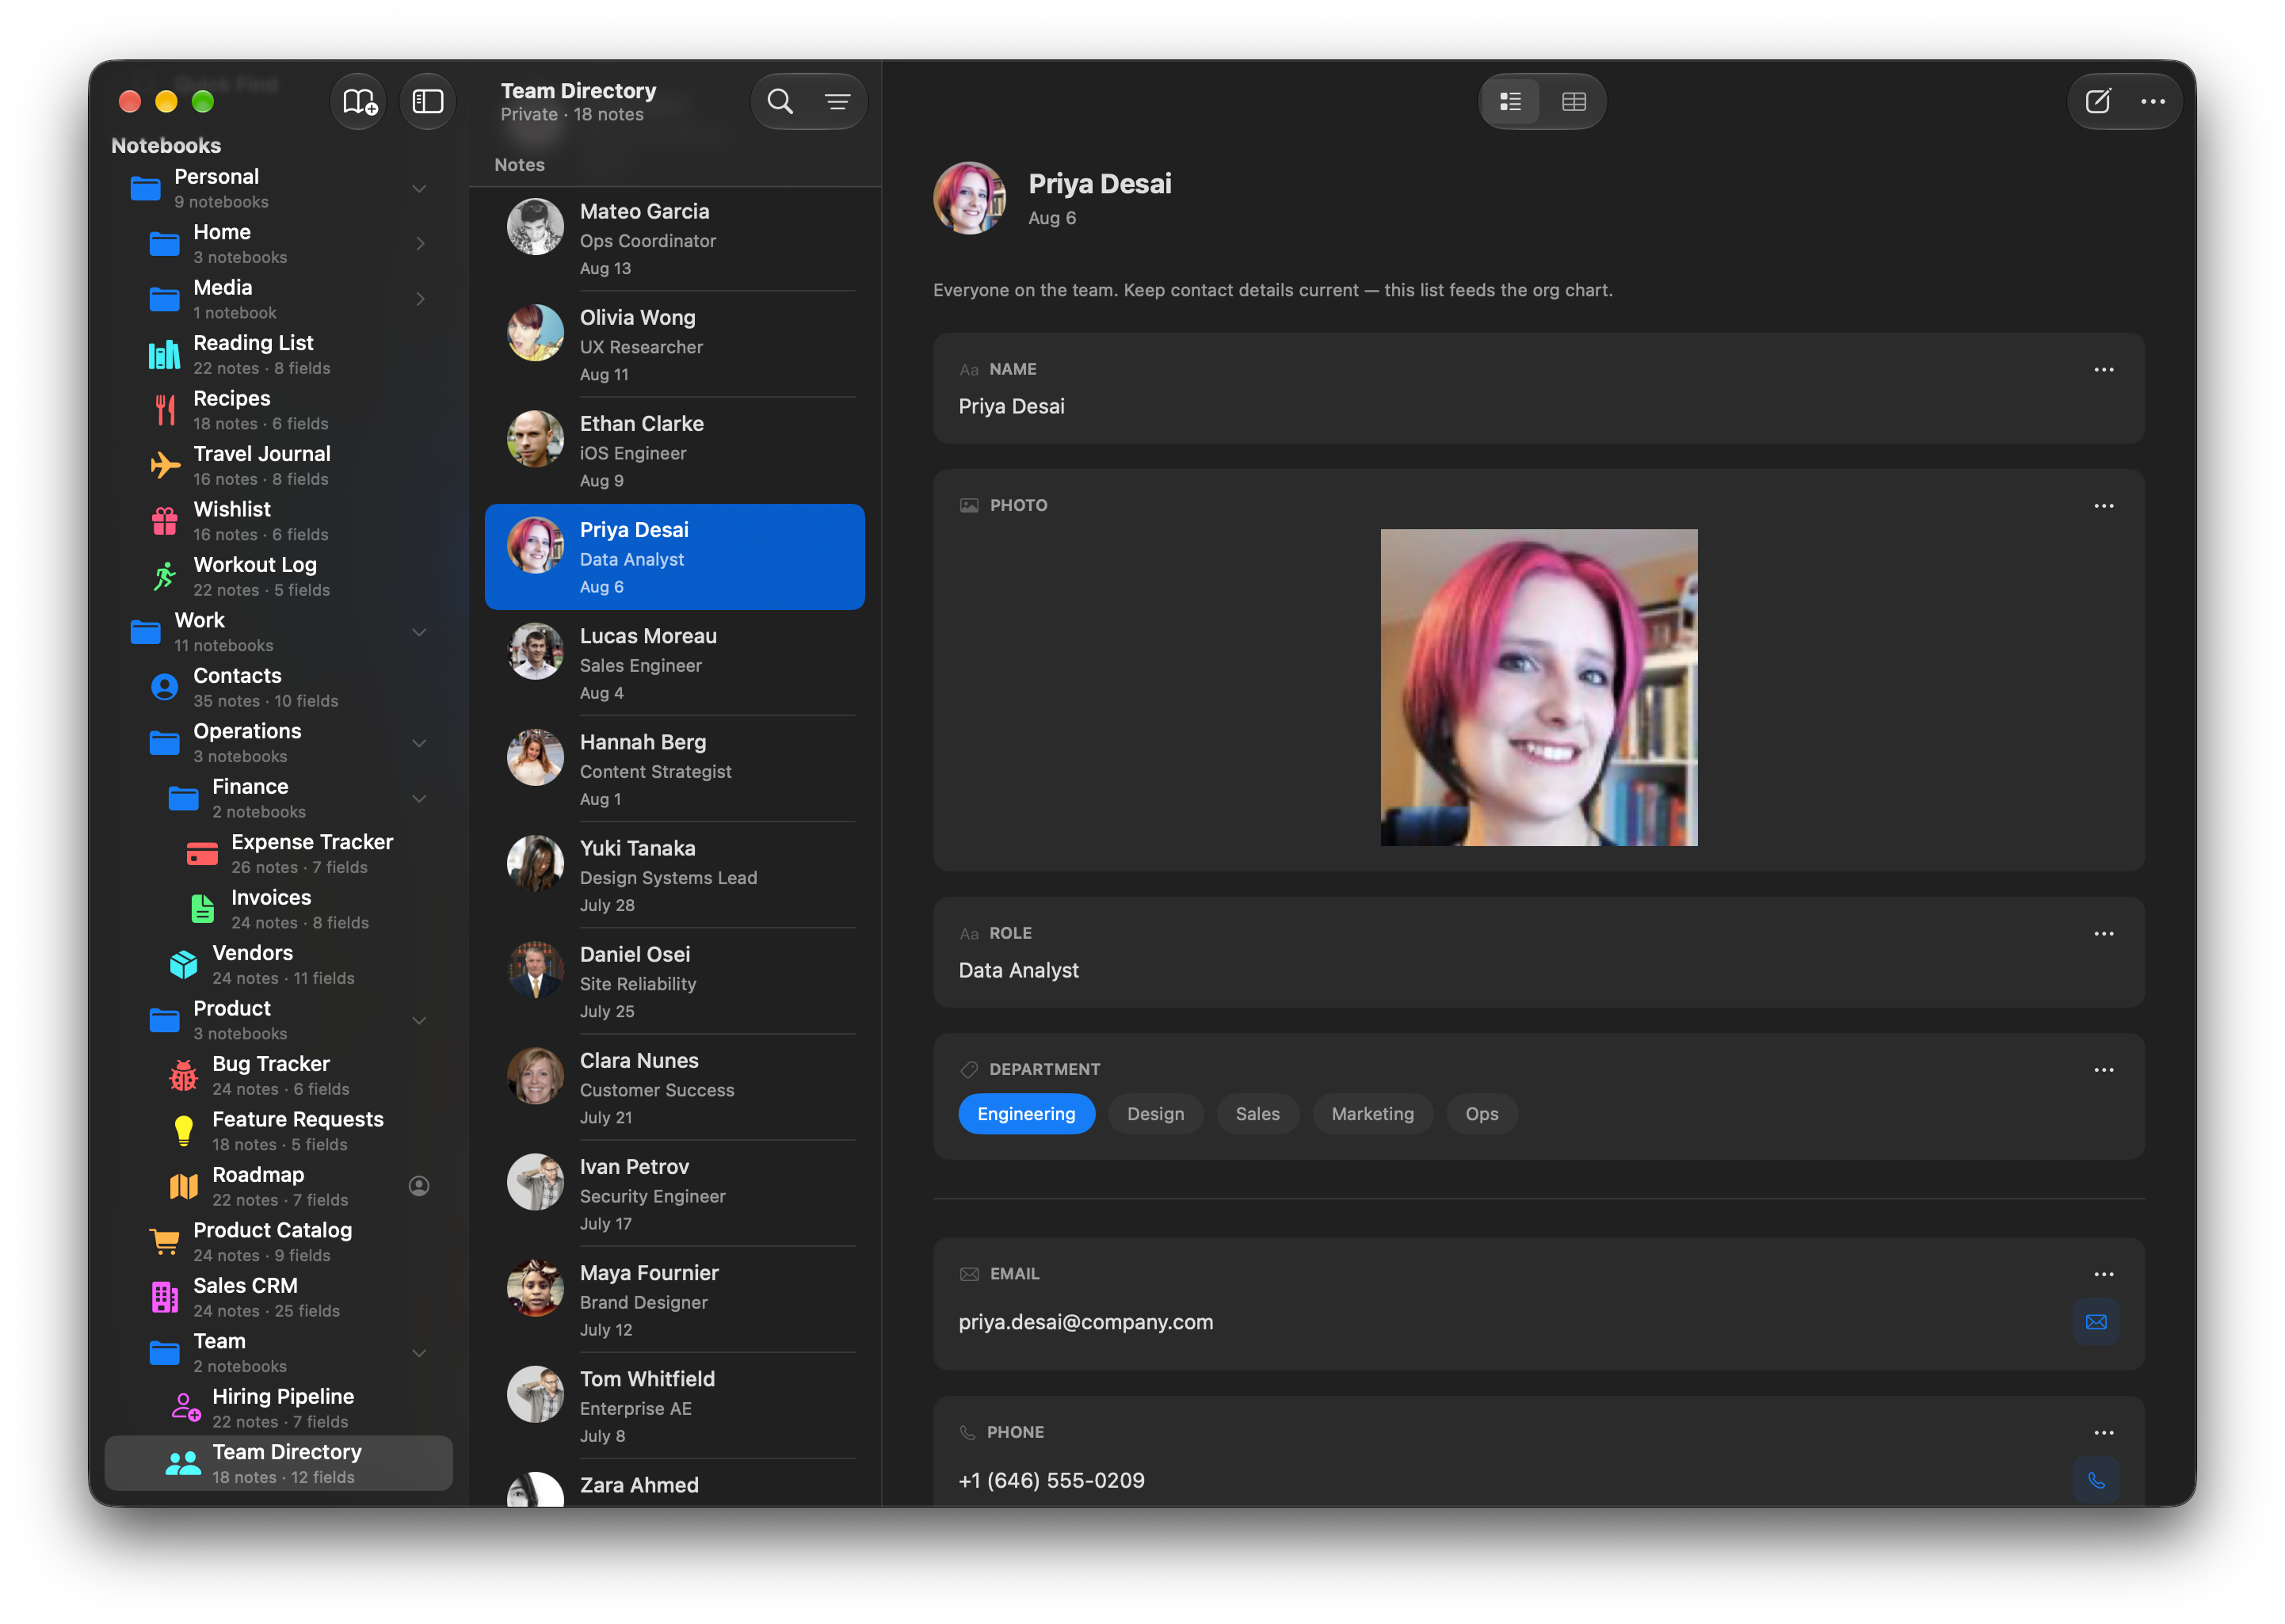
Notes view has three columns:
- Notebook sidebar (left) — Your notebooks and groups.
- Note list (center) — All notes in the selected notebook, sorted and searchable.
- Note detail (right) — The full content of the selected note, with inline editors for every field.
Click a note in the list to view and edit it in the detail panel.

Browsing Notes
Each note in the list shows:
- Title — The value of the first text-style field (Short Text, Long Text, Email, Phone, or URL), or a custom title if you've set your notebook to use one.
- Subtitle fields — Any fields you've marked as visible with the eye icon in the Fields editor. Tags show as colored pills, ratings as stars, and a URL shows the site's icon beside it so you can pick a link out of the list without reading it. A field holding several links shows the first, with a +N badge for the rest.
- Creation date — When the note was created, written the way you'd say it: "Today", "Yesterday", or "March 4". The year only appears when it isn't this one. You can hide the date in the notebook's Settings.
- Unread indicator — A blue dot appears on notes that haven't been viewed yet. This is especially useful when new notes arrive from web form submissions or shared notebook sync.
The note count appears beside the notebook's name — in the window subtitle on Mac and iPad, and above the list on iPhone.
Searching
A search field lets you filter notes in real time. Type any text and the list narrows to notes that contain a match in any field value. The search is case-insensitive.
Where it lives depends on the device. On Mac and iPad it's at the top of the note list — click the magnifying glass in the toolbar to reveal it. On iPhone (and iPad in Split View) it sits in the floating bar at the bottom of the screen, between the view-options and compose buttons, so it's always in reach of your thumb.
Clear the search by clicking the X button or deleting the text.
Sorting, Grouping, and Filtering
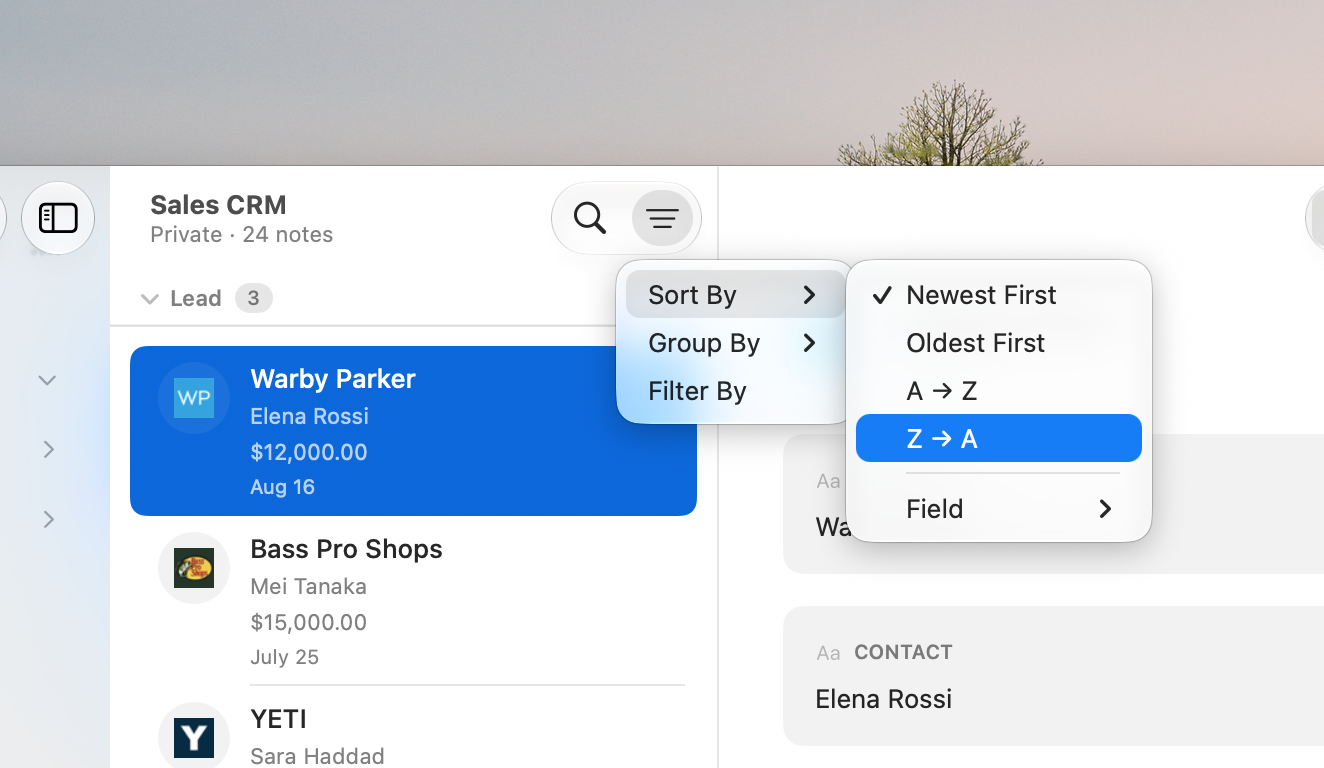
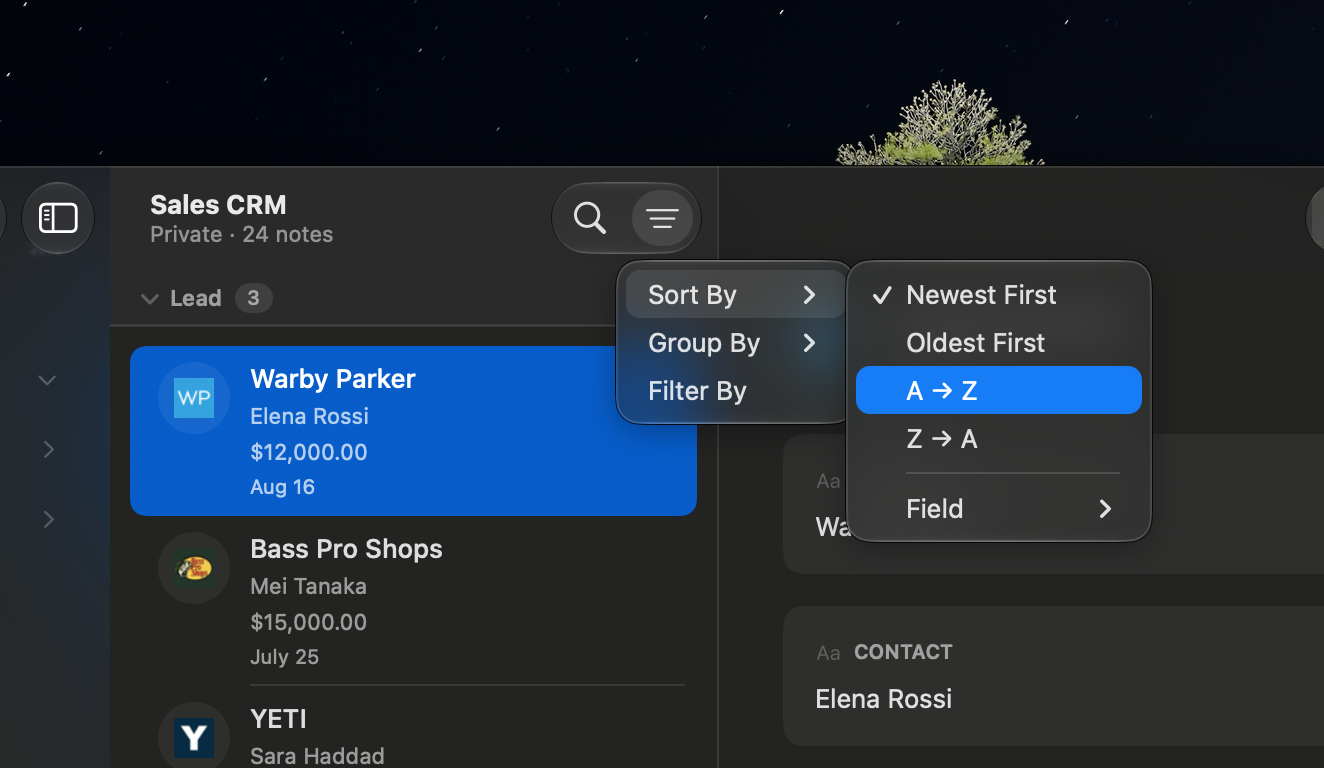
The View Options button holds three tools for shaping the list. It's the icon with three descending lines — in the toolbar on Mac and iPad, and in the bottom bar on iPhone. It turns blue when a filter is hiding notes, so you always know the list isn't showing everything:
Sort By
Four quick presets:
- Newest First (default) — Most recently created notes at the top.
- Oldest First — Oldest notes at the top.
- A to Z — Alphabetical by note title.
- Z to A — Reverse alphabetical by note title.
…plus a Field submenu that sorts by any field in the notebook, exactly like clicking a column header in Table view. This is how you order a list by a due date, a price, a rating, or anything else you track.
Pick a field to sort by it ascending; pick the same field again to flip to descending. The Field row shows the current field's name with an arrow for its direction — ↑ ascending, ↓ descending — so you can read the sort without opening the submenu. Choose one of the four presets above to go back to sorting by date or title.
Group By
Organize the note list into collapsible sections by a field's value — the same grouping the Table view offers:
- Tags — One section per tag value (notes with multiple tags appear in multiple sections), plus a "No value" section.
- Toggle — "Yes" and "No" sections.
- Rating — Sections from 5 stars down to 1, plus "No rating".
- Select — One section per configured option, plus "No value".
- Reference — One section per linked note, by its title (a note linking three appears under all three), with trailing "Unknown note" (links that can't be resolved) and "No value" sections.
- Added by / Edited by — One section per person, plus "No value". Shared notebooks only.
Click a section header to collapse or expand it. Pick None to return to a flat list.
Filter By
Opens the same type-aware filter editor as the Table view — add as many conditions as you need (a note must match all of them), with operators tailored to each field type. See the Table view's filtering guide for the full operator list; the behavior is identical here.
All three settings are saved to the active preset and sync across your devices.
Presets
Just like the Table view, the notes list supports Presets — saved combinations of sort, grouping, filters, and collapsed sections that you can switch between with one click. The notes view keeps its own presets, separate from the Table view's.


- Turn on the preset tabs with Show Preset Tabs — the first item in the ⋯ (More) menu, or in the View menu on Mac and iPad.
- Add a preset with the + button at the end of the strip, or View → New Preset… on Mac and iPad. Each notebook can hold up to five.
- Rename or recolor one by right-clicking its tab (long-press on iPhone and iPad) and choosing Edit Tab.
- Reorder from the same menu: the tabs start jiggling and each grows a drag handle on its left edge — drag by the handle to move a tab, then click the ✓ to finish.
- Delete from that menu too. You can remove any preset except the last one.
- Switch by clicking a tab, or cycle with
Ctrl+TabandCtrl+Shift+Tab. - Presets sync across your own devices — including which one is selected and whether the tabs are shown — and are always private to you in shared notebooks.
See the Table view's Preset Tabs guide for the full details.
Editing a Note
Click a note in the list to open it in the detail panel on the right. The detail panel shows:
- Title area — Either the first field value or an editable title field, depending on your notebook's title mode setting.
- Created date — Displayed below the title.
- Author info — In shared notebooks, you'll see who created the note and who last edited it.
- Field cards — Each field appears as its own card with a type-specific inline editor.
Every field type has its own editor:
- Text fields show a text input or expanding text area.
- Contact fields show a text input with a tap-to-action button (email, call, open URL).
- URL shows the page's title with the site's icon — or your own name for it, via Edit Title. A field set to allow multiple links shows one row per link, with an Add link button underneath.
- Number and Currency show a numeric input. Currency formats the value using the field's configured currency.
- Rating shows tappable stars.
- Date shows a tappable pill that opens a calendar date picker. Optionally captures a time too, and can color-code dates that are today — both via per-field toggles in the field editor.
- Toggle shows a switch.
- Tags show a row of tappable pills, one per configured option. Selected pills fill with the tag's color.
- Checklist shows a to-do list you can add to, tick off, rename, reorder, and delete from.
- Image shows a preview with options to pick a file or drag and drop.
- Secret shows dots with a tap-to-reveal button that requires biometric authentication.
- Reference shows a searchable picker to select linked notes from your other notebooks. Each linked note appears as a chip — click it to open that note; to remove the link, right-click the chip (long-press on iPhone and iPad) and choose Delete. When the field allows multiple notes, the picker stays open so you can tick several in one visit.
- Formula shows the computed result (read-only).
- Color shows a color picker, a hex text input, and a swatch preview.
- Duration shows separate inputs for hours, minutes, and seconds.
- Percent shows a numeric input with a progress bar that fills proportionally.
- Barcode shows a text input for the barcode string. When a value is entered, a Code 128 barcode image is generated below. On iPhone and iPad, a Scan button opens the camera to scan a physical barcode.
- QR Code shows a text input for the QR code value. When a value is entered, a QR code image is generated below. On iPhone and iPad, a Scan button opens the camera to scan a QR code.
- Select shows a dropdown of the configured options.
- Comments shows the activity log, where you can post an entry or delete an existing one.
- Button shows a button that opens its configured link.
- Layout fields (Divider, Heading, Description) display as visual elements with no interaction.
Changes save automatically as you edit. There's no save button.
Reordering Fields
On Mac: drag field cards up and down in the detail panel to change the field order. Grab a field card and move it to a new position. A colored indicator shows where it will land.
On iPhone and iPad: open the Edit Fields sheet from the toolbar's ⋯ (More) menu, then drag fields up and down in the list.
Either way, this changes the field order for the entire notebook, not just the current note. All notes will reflect the new order, and the table view columns will update to match.
Creating and Deleting Notes
Creating a Note
Click the compose button — in the toolbar on Mac and iPad, in the bottom bar on iPhone — or press Cmd+N on Mac. A new note appears in the list with all fields empty and ready to fill in.
Duplicating a Note
Right-click a note (or use the note's menu) and choose Duplicate Note, or press Cmd+D on Mac with a note selected. The copy includes all of the note's field values.
Deleting a Note
There are a few ways to delete a note:
- Three-dot menu — Click the ⋯ (More) menu in the note detail toolbar and choose Delete Note.
- Swipe — On iPhone and iPad, swipe left on a note in the list to reveal the delete button.
- Keyboard — Select a note and press Delete on Mac.
A confirmation dialog appears before the note is deleted — unless the note is completely empty, in which case it's removed right away.